Ubiquiti AG-HP-2G16 Guide de l'utilisateur
Naviguer en ligne ou télécharger Guide de l'utilisateur pour Antennes de réseau Ubiquiti AG-HP-2G16. Ubiquiti AG-HP-2G16 User guide Manuel d'utilisatio
- Page / 24
- Table des matières
- MARQUE LIVRES
- 2 GHz High-Performance 1
- Integrated InnerFeed 1
- Introduction 2
- Installation Requirements 3
- Application Examples 3
- Hardware Installation 5
- *720-00017-03* 6
- 720-00017-03 6
- Release Button 8
- (80 lb-in) 9
- Specifications 14
- Safety Notices 15
- Electrical Safety Information 15
- Limited Warranty 16
- Disclaimer 17
- Limitation of Liability 17
- Compliance 18
- Industry Canada 19
- RF Exposure Warning 19
- CE Marking 19
- Français 21
- Italiano 21
- Declaration of Conformity 22
- Online Resources 23
Résumé du contenu
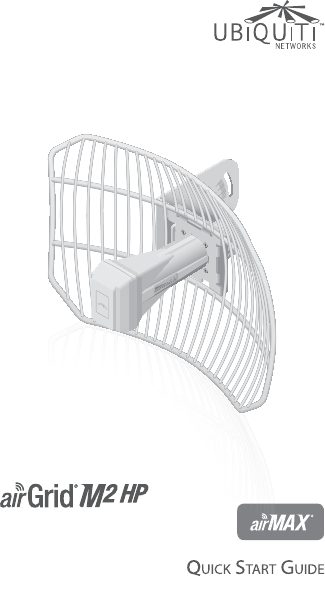
2 GHz High-Performance Integrated InnerFeed™ AntennaModel: AG-HP-2G16
Connecting Power over Ethernet1. Connect the other end of the Ethernet cable from the airGrid to the Ethernet port labeled POE on the PoE Adapter.2.
airOS ConfigurationVerify connectivity in the airOS Configuration Interface and select the airGrid antenna size. 1. Make sure that your host machine
5. Select the airGrid antenna size:a. Click the Wireless tab.b. From the Antenna drop-down list, select the appropriate option.c. Click Change to
Installer Compliance ResponsibilityDevices must be professionally installed and it is the professional installer's responsibility to make sure th
SpecificationsAG-HP-2G16Dimensions 370 x 270 x 270 mm (Mount Included)Weight 1478 g (Mount Included)Networking Interface (1) 10/100 Ethernet PortEnclo
Safety Notices1. Read, follow, and keep these instructions.2. Heed all warnings.3. Only use attachments/accessories specified by the manufacturer.W
Limited WarrantyUBIQUITI NETWORKS, Inc (“UBIQUITI NETWORKS”) warrants that the product(s) furnished hereunder (the “Product(s)”) shall be free from de
DisclaimerEXCEPT FOR ANY EXPRESS WARRANTIES PROVIDED HEREIN, UBIQUITI NETWORKS, ITS AFFILIATES, AND ITS AND THEIR THIRD PARTY DATA, SERVICE, SOFTWARE
NoteSome countries, states and provinces do not allow exclusions of implied warranties or conditions, so the above exclusion may not apply to you. You
Industry CanadaThis Class A digital apparatus complies with Canadian ICES-003.To reduce potential radio interference to other users, the antenna type
IntroductionThank you for purchasing the Ubiquiti Networks™ airGrid® 2GHz High-Performance Integrated InnerFeed™ Antenna. This Quick Start Guide is d
RoHS/WEEE Compliance StatementEnglishEuropean Directive 2002/96/EC requires that the equipment bearing this symbol on the product and/or its packaging
EspañolLa Directiva 2002/96/CE de la UE exige que los equipos que lleven este símbolo en el propio aparato y/o en su embalaje no deben eliminarse junt
Declaration of ConformityČesky [Czech]UBIQUITI NETWORKS tímto prohla uje, e tento UBIQUITI NETWORKS device, je ve shod se základními po adavky a dal
Italiano [Italian]Con la presente UBIQUITI NETWORKS dichiara che questo UBIQUITI NETWORKS device, è conforme ai requisiti essenziali ed alle altre dis
www.ubnt.com©2013 Ubiquiti Networks, Inc. All rights reserved. airGrid®, airMAX®, airOS®, InnerFeed™, TOUGHCable™, Ubiquiti Networks™, and the Ubiqu
Installation Requirements• 10 mm or 3/8" wrench• Shielded Category 5 (or above) cabling should be used for all wired Ethernet connections and s
LEDsSignal In airOS, you can modify the wireless signal strength threshold values for each LED on the Advanced tab under Signal LED Thresholds. The d
Hardware InstallationAssemble the airGrid according to your chosen polarization.1. Attach the L-Bracket to the Grid Reflector by sliding the tabs int
*720-00017-03*720-00017-033. Attach the Rear Housing:a. Ensure the four alignment holes on the Grid Reflector and L-Bracket are lined up. b. Orient
5. Route an Ethernet cable through the Rear Housing. Connect the cable to the Ethernet port on the back of the Antenna Feed.6. Attach the Antenna Fe
7. Lightly pull the Antenna Feed to ensure that the Release Button is fully engaged and locked into place.Bottom ViewRelease ButtonNote: If you need
9. Re-attach the cable feed door to the Rear Housing. Ensure the locking tab securely latches to the Rear Housing.10. Insert the M6 U-Bolt into the P
© 2020, manymanuals.fr. Tous droits réservés | 1.680 s |
 Manymanuals.com
 Manymanuals.de
 Manymanuals.fr
 Manymanuals.it
 Manymanuals.pl
 Manymanuals.cz
 Manymanuals.es
 Manymanuals-pt.com
Commentaires sur ces manuels